
Benchmark Blog
Kitchen Lighting Layers That Actually Work
July 23, 2026 · By Lee Veader Sr. , Founder
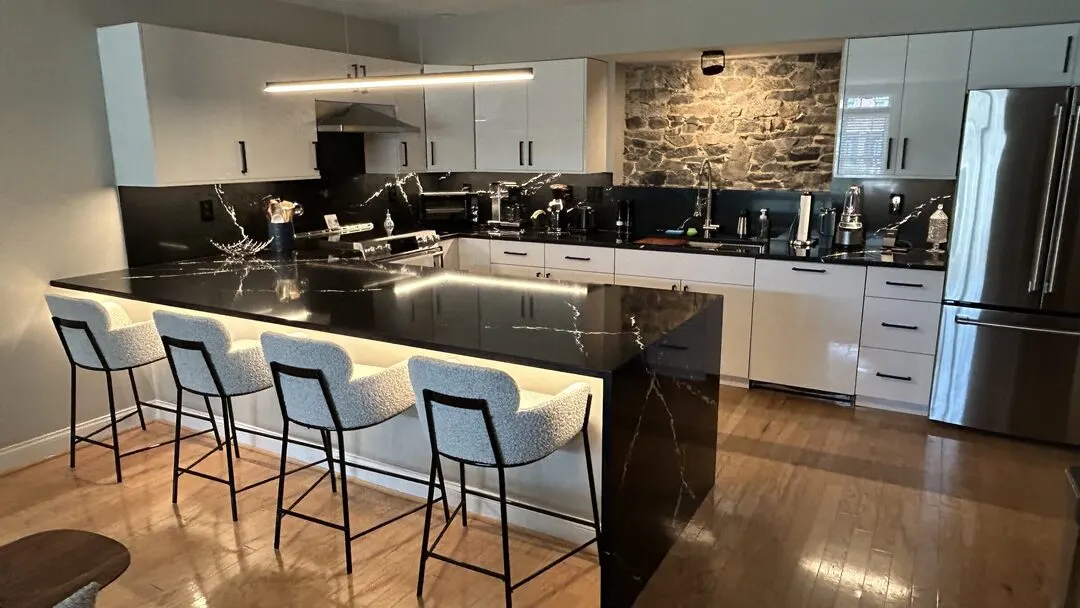
Ask most homeowners what they want changed about their kitchen lighting and they will not say “add more fixtures.” They will say the room feels dim in the evening, or there is a shadow right where they chop vegetables, or the light over the sink never quite reaches the far counter. That is not a bulb problem. It is a layering problem, and it is one of the easiest things to get right during a remodel and one of the most annoying things to fix after.
One ceiling light was never going to be enough
Most older Seacoast kitchens were built around a single center fixture, sometimes two. That layout made sense when kitchens were smaller and mostly closed off from the rest of the house. In an open kitchen with an island, a peninsula, and counters on two or three walls, one light source leaves half the room in its own shadow no matter how bright the bulb.
Good kitchen lighting is not about adding more of the same fixture. It is about giving different jobs to different lights.
The three layers, in plain terms
- Ambient light fills the room evenly, usually recessed ceiling cans or a flush mount, so you can walk in and see everything without squinting.
- Task light is aimed at where you actually work: the counters, the range, the sink. This is the layer most older kitchens skip entirely, and it is the one you notice the moment it is missing, usually as your own shadow falling across the cutting board.
- Accent light is under-cabinet strips, in-cabinet glass-front lighting, or a pendant over the island. It adds warmth, depth, and a softer option for evenings when the full overhead lighting feels like too much.
None of the three is optional if you want a kitchen that works well at 7 a.m. and still feels good at 8 p.m. A kitchen with only ambient light looks fine in photos and frustrates you at the stove. A kitchen with only task light feels clinical, like a lab. Layer all three and the room adjusts to whatever you are actually doing in it.
Why this is cheap now and expensive later
Here is the part worth planning around, and the whole reason we bring lighting up early in a kitchen remodel, not as an afterthought once cabinets are ordered.
Under-cabinet lighting needs low-voltage wiring run before the cabinets and backsplash go up, ideally tucked behind the upper cabinets where it never shows. Recessed cans need clean access through an open ceiling before drywall closes it up. A pendant over an island needs power in the right spot before the island itself is set. Every one of these is a straightforward add when the walls and ceiling are already open for other work.
Try to add the same lighting after the kitchen is finished and the job changes completely. Now an electrician is fishing wire through a closed ceiling or drilling through the underside of cabinets you just paid to install. It usually means visible surface conduit, a patched section of drywall that never quite blends in, or cabinets pulled back off the wall to run wire behind them. We have seen this exact regret more than once, and it is one of the reasons layered lighting shows up on our list of common kitchen remodel mistakes worth avoiding.
Where the money actually goes
Most of the cost in a layered lighting plan is the electrical work, not the fixtures themselves. Running new circuits, adding switches and dimmers, and wiring low-voltage under-cabinet strips is labor, and that labor is far cheaper while the walls and ceiling are already open during a remodel than as a standalone project afterward.
Fixtures themselves span a wide range. A handful of recessed cans and a run of under-cabinet LED strip lighting is a modest add to a kitchen remodel budget. A statement pendant or a chandelier over an island can run anywhere from a couple hundred dollars to well over a thousand, depending on the fixture you fall in love with. We build the lighting plan into the one fixed price for the finished kitchen, so you know the full number before the work starts, not after an electrician’s invoice shows up separately.
A few details that make a real difference
Put dimmers on the ambient and accent layers at minimum. A kitchen that can go from bright morning light to a softer evening glow with one switch gets used differently, and more often, than one stuck at full brightness all day. Keep the color temperature consistent across fixtures, somewhere in the warm-white range, so the room does not feel like two different kitchens depending on which light is on. And place task lighting for where your body actually stands at the counter, not just centered on the cabinet above it. A few inches makes the difference between light on your hands and light on the back of your head.
Lee Sr. still walks kitchens with homeowners and points out exactly where the old lighting left them in their own shadow. It is one of the simplest changes we make, and one of the ones people notice every single day afterward.
If you are planning a remodel, get a sense of what a Seacoast kitchen actually costs, or get a custom estimate in about two minutes below.